WeldNfab.com
Welding Ideas - Projects - Tips & Tricks
GALLERY
Some of my welding work and projects.
Heron Gate
A client wanted a gate to provide safety for children around their Koi pond. I've always found the silhouette of a Heron to be fascinating and wanted to incorporate a Heron Silhouette into some of my metal art. This job presented the perfect opportunity! Although the client was expecting a mundane metal picket garden gate, I really wanted to do something artsy and surprised them with this. What better place for a silhouette of a Heron than next to a Koi pond?
Now, bear in mind I didn't have any fancy CNC plasma table to cut this out with.
To make the paper template for this was a lot of work, but well worth it.
First, I scoured the internet to find a suitable silhouette of a heron. When I found one though, there was no interesting background. So I had to source another silhouette of some cattails.
Next I combined both pictures in Microsoft Publisher and printed them off full size using the indexing feature of the software and printer. Then I pasted the pages to a large sheet of cardstock and began the painstaking work of cutting out the silhouette with an exacto knife.
Once I had the "template" cut out, I laid it out on a sheet of 16 gauge steel and sprayed some black rust paint over it, leaving the outline of the artwork on the steel. Not having a plasma cutter, I oxy-fuel cut the image out using a tiny 000 tip on my oxy-acetylene torch.
The resulting image needed some grinding and cleanup, but it was quite acceptable. I built a frame out of 1 1/4 " steel square tube and welded the artwork within the frame.
Turned out quite nice. The client was surprised and absolutely thrilled. If I recall correctly, the wife cried when she saw it.


You can edit text on your
Baker's Rack
I was walking through a department store one day when a very nice looking baker's rack caught my eye. I thought to myself: "I can make that" So I spent the next half hour taking measurments and making mental notes about its construction and went home and built it.
Materials used were: 1/2", 5/8" and 1" steel square tubing as well as some 3" pipe I sliced into 1/2" rings and in turn cut them in half to serve as wine bottle supports.
The drawers were all joined with dovetail joints, and the drawer fronts were made from birds eye maple.
I painted all the steelwork in a charcoal grey "hammered" paint finish.
I gave the piece to my brother and sister in law as a wedding anniversary gift.

Handrail Bracket
A contractor I work with had a high end home he was doing some work on, and needed some handrail brackets that just weren't available commercially in dimensions he needed. They would have to be custom fabricated. The owner of the home loved wildlife and had many wildlife carvings and pictures, etc. The contractor gave me artistic license to decorate the handrail bracket with a wildlife silhouette. I used some 3/8" round bar, and cut a silhouette of a buck out of some 16 ga steel. and just sprayed it with some flat black rust paint.

Courtyard gate
A construction contractor approached me and asked me if I could custom fabricate a gate for a client's courtyard. He said the client wanted something "Gothic". He gave me the finished dimensions and let me come up with a design.
I knew I wanted to incorporate a double reverse arch and some spear points, but I decided the gate needed some more architectural detail to make it look less like a jail cell door. I chose some cast iron baluster collars from Geobezdan.com and spaced them on every second bar following the contour of the gate top. I also custom fabricated some adjustable hinges. The client loved the finished product.
Y
Custom Trailer Hitch
Custom Trailer Hitch
A friend of mine had a cute little Suzuki pickup that he wanted a trailer hitch for. The vehicle was a right hand drive imported from Japan. Off the shelf trailer hitches were not available for this vehicle, so if my friend wanted to tow anything, it meant a custom fabricated hitch.
Building the hitch was the easy part. Figuring out how to mount it was the challenge. I decided I needed to bolt it to the rear spring hanger mounts. This meant fabricating a pair of trapezoid shaped brackets, one for each spring hanger. The trapezoid shape required a pair of compound bends.
I cut a suitable piece of cardboard and wrapped it around the spring hanger, trimming it square, and marking where the bend lines needed to go. After that it was a simple matter of tracing the cardboard template onto some 1/4" X 4" steel flat bar.
Next I flame bent the bends with the help of my bench vise and oxy-acetylene torch. I located the mounting holes in the brackets by holding them up to the spring hangers and marking the locations and drilling them out. After that it was a simple matter of bolting the brackets to the spring hanger and building the hitch between them.
I think it turned out really well and my friend liked it.
I


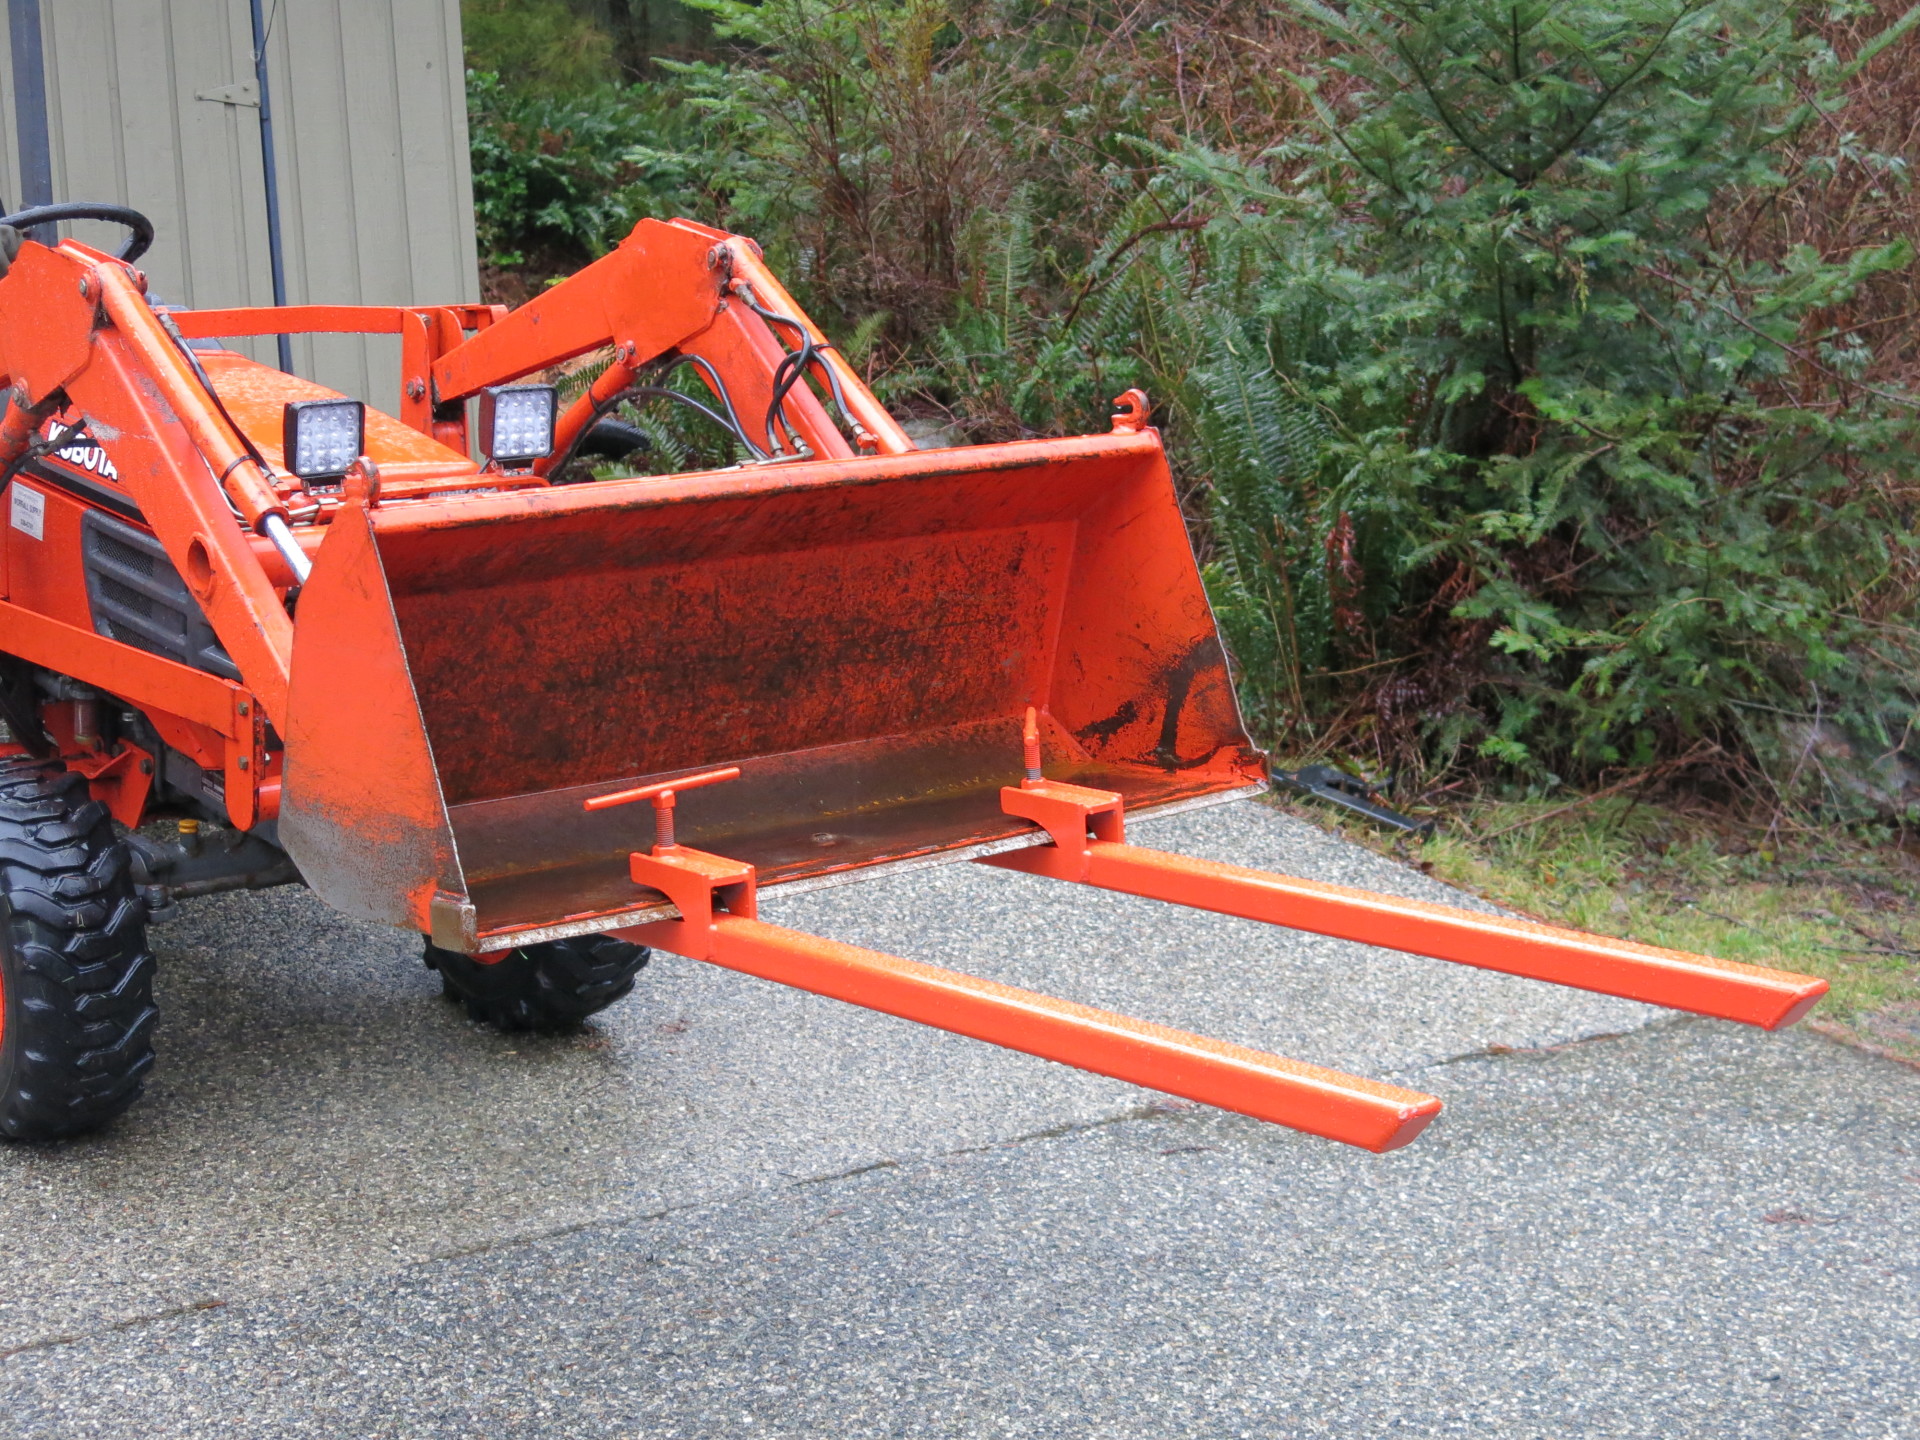
Tractor Forks
I'm always on the lookout for things that I can fabricate in my home shop. These are in demand for any one with a little tractor with a front end loader. These forks attach to the bucket of any front end loader. Any one who has a garden tractor with a front end loader has lifting power. A proper forklift attachment for most of these tractors are big bucks, plus they require removal of the bucket. For anyone who needs to move a pallet they are as handy as a shirt pocket. No removal of the bucket required. Just slide the forks onto the bottom edge of the bucket and tighten the clamp bolt. Less than two minutes to install, and they take up very little space.
Just stand them up in a corner.
Materials were: 2" x 2" x 3/16 "square tube, 3/8" plate, 5/8" bolt and nut, 1/2" round bar, and welding wire, or 7018 welding rod.

Before
After
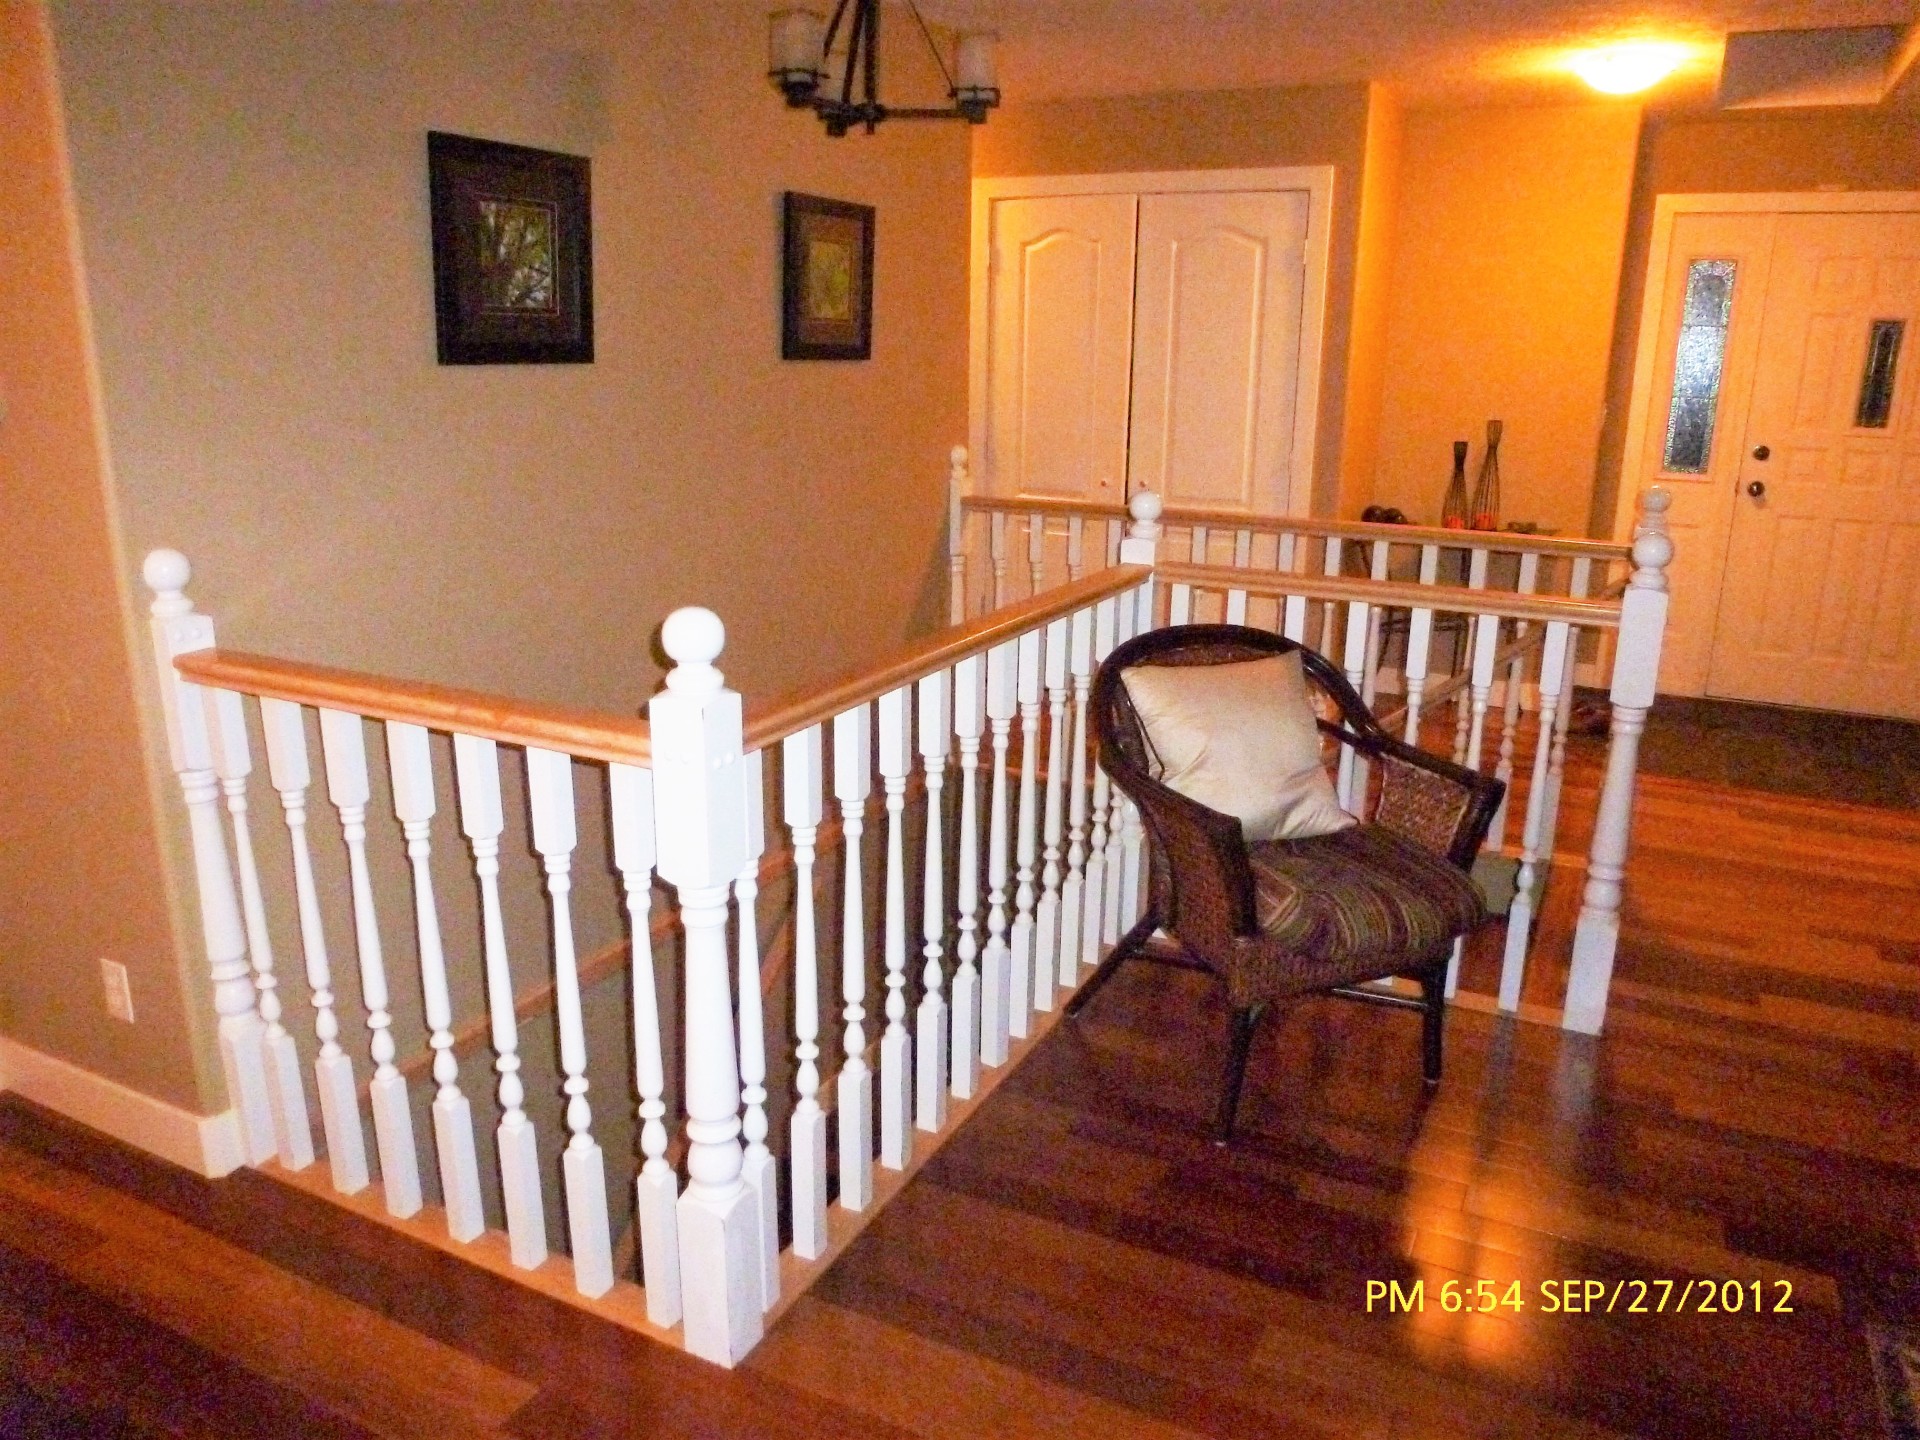
Stair Railings
In the above photos, I was commissioned to fabricate a set of railings in a homeowner's house to give it a more updated appearance. The existing turned wooden ball posts and railings gave the house a really dated cluttered look. The homeowners wanted a sleeker modern look.
Materials were, 5/8 " round bar for the horizontals, 2" X 1" rectangular tube for the top rails and handrails, 1 1/2 " square tube for the posts, and 1 1/2 " flat bar for the midspan uprights. I fabricated the railings in two complete pieces, a right, and a left. For the left railing, the "z" shaped component, I first mocked up one 5/8 " round bar in the finished shape, and made sure I would be able to fit it through the front door before I continued with the build.
I really prefer not to paint, and in this case the homeowner worked at an autobody shop, so when I finished fabricating, he just took everything to work and had their painter paint it all.
,,, Dump Trailer Stabilizer Legs
A client of mine wanted some repairs on his dump trailer.
He also asked me if I could engineer something to stabilize the
trailer when he loaded his 5,000 pound excavator onto it.
A pair of telescoping stabilizer legs should do the trick I
thought. So I fabricated a pair out of 2" tube steel that slid
nicely inside some 2 1/2" receiver tube material. I drilled out
some 5/8" holes in the 2" tube for hitch pins, drilled out
matching holes in the 2 1/2" receiver tube, and welded some
8" x 8" x 1/4" checker plate pads on the end of the 2" tube and
I was ready to install.
I was busy marking out the location of the cut line in the
horizontal stiffener, when the client's son came home and
noticed that I intended to install the stabilizer vertically in line
with all the other uprights. He had a doubtful look on his face and explained to me that he usually loaded the excavator with the box of the trailer tilted about 15 degrees so that the tracks wouldn't slam down on the trailer floor when they came off the top of the ramps. That made total sense to me, so we tilted the dump box to the angle he usually loaded at, I marked out the new angle and zip cut the stiffener and welded in the stabilizers. Finished up by giving them a rattle bomb paint job of Kubota orange.
The client was very happy with the results. When his wife saw the trailer and wondered what he was so happy about, she asked him what I had done to it, "because, ....weren't those stabilizers on there all along?"............. I took that as a compliment!
